3. Projects
Assuming you already registered, the recommended workflow consists in:
- Creating a Project
- Preparing your first run by downloading our Excel template, and filling it as per your layout.
- Creating and running a new decompression analysis
3.1. Creating a project
If needed, create a new project from the main projects menu:
Projects>>Create Project.
Fill-in the form to create a project, then save it. The Project’s Creation Form is organized in three sections: (1) Aircraft Data, (2)Project’s Team and (3) Decompression Runs Default Parameters.
3.2. Aircraft’s data and Project’s team
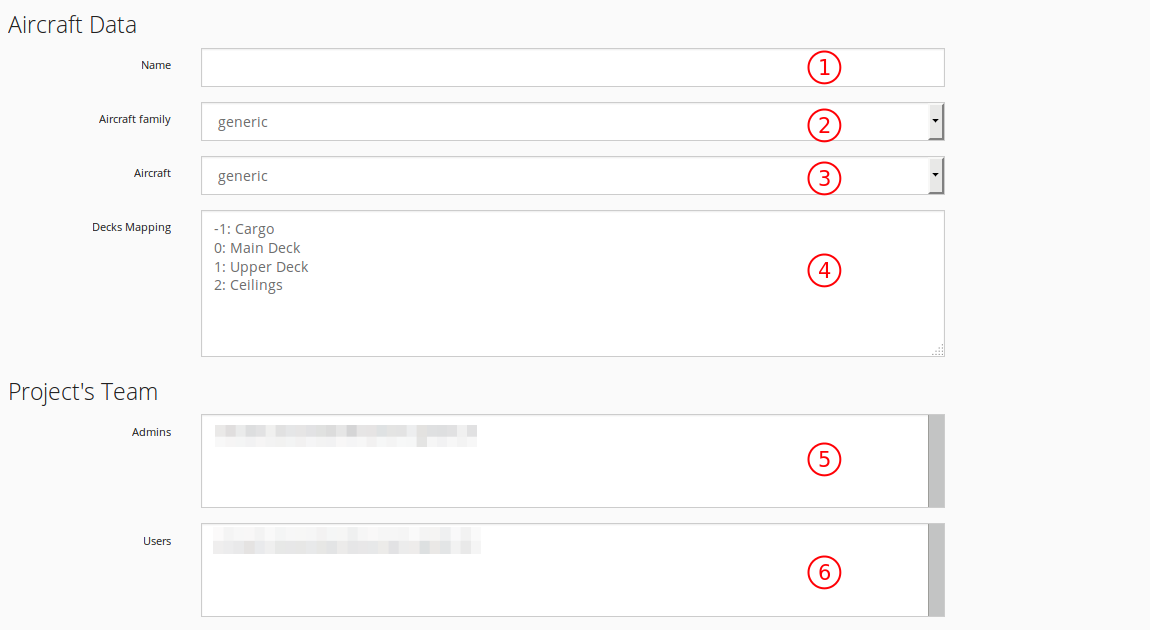
Fig. 3.1 Project’s creation Form –(1/2) Aircraft Data & Project’s team –
The two first sections of the form aims to provide general information about the Aircraft and the team.
As shown in Fig. 3.1
NameName of the projectAC familyAircraft type (eg. A320, A330, B747, etc.)AircraftAircraft type (A319CJ, A330-200, B747-8, etc.)Decks MappingAssociation of deck levels with deck namesAdmins(optional) list of users allowed to perform administraor tasksUsers(optional) list of allowed users
Note
Once the project is validated, the “decks mapping” (item 4) cannot be changed anymore
3.3. Decompression Runs Default Parameters
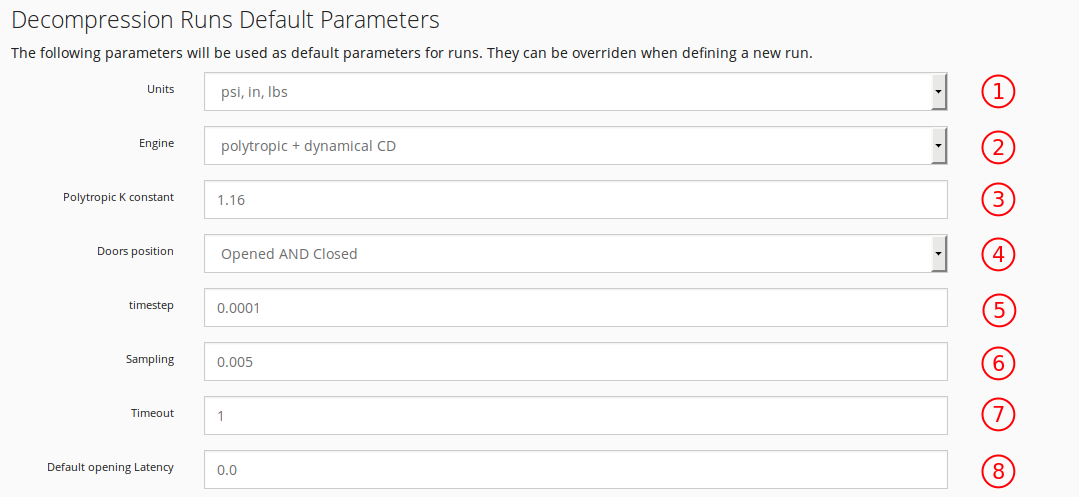
Fig. 3.2 Project’s creation Form –(2/2) Decompression Runs Default Parameters –
As shown in Fig. 3.2
Additionnally, some default parameters for runs are to be provided. Those parameters will be proposed by default for each new analysis of the project.
UnitsSet of units in which the model and analysis results are givenEngineThermodynamical engine to usePolytropic constantprovide (optionally) the relevant poly tropic constant.Doors positionWhich initial condition (configuration) to use.timestepSimulation time increment. .samplingData sampling for disk storage.timeoutSimulation maximum time.Default opening latencySet a default latency for opening feature.
3.4. Deleting a project
Deleting a project is authorized for the author of the project only. To delete a project, click on the trash icon as shown in Fig. 3.3.
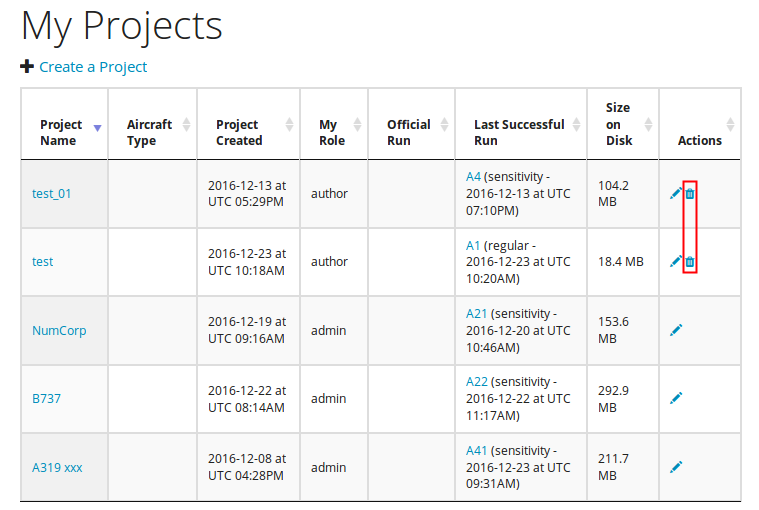
Fig. 3.3 Deleting a project
3.5. Managing a project
From the projects list overview, the user can enter a project by clicking on the project name (cf. Fig. 3.3)
Once in the project management: a blank project may look like this:
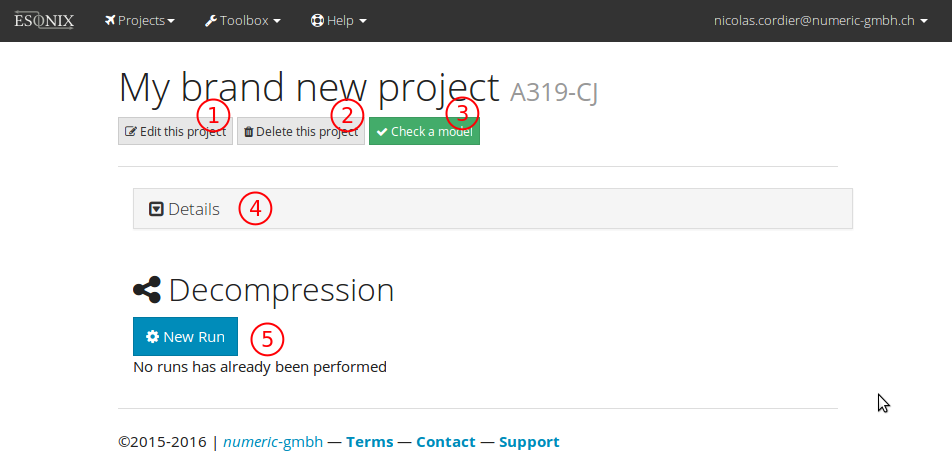
Fig. 3.4 Blank project overview
as per Fig. 3.4:
Edit this Project: open the Project’s parameters form ascreate_project`.Delete this project: delete the current project.Check a model: opens the form for model validation.- Folded panel hiding some details about the project. Click to unfold.
New Runbutton: Prepare and launch a new regular run within the project.
A project containing several nodes will display a list of the existing nodes with additional informations.